Turtledeck 1
Turtledeck 1
Below, I've begun the process of forming the "turtledeck" behind the cockpit. I've temporarily glued a half-round piece of plywood to the top of the longerons just in front of the tail to serve as a sanding template. The back of the canopy serves as the forward sanding template.
Thinking I might save some money, I bought some cheap polyisocyanurate insulation board from Home Depot after hearing that it sands pretty well. I used this material to form three foam bulkheads and top ribs--a basic frame into which I would place good urethane foam from Wicks Aircraft Supply. I had to peel the silver paper off the edges of the bulkheads, which turned out to be a bigger hassle than I thought it would be. The insulation foam turned out NOT to sand very consistently and I would not use it if I had a second chance. However, it did serve its purpose as a frame. The basic idea of forming a foam "frame"--and my design of it as pictured--worked very well. I duct-taped the foam bulkheads to the 5/8 square spruce horizontals which cross the fuselage. If I could do it over, I'd 1) make five bulkheads instead of three, and 2) use good urethane foam for the bulkheads and top ribs.
Since the bulkheads will have served their purpose after the turtledeck is glassed, I'll just cut right through them with a blade attached to a broomstick in order to remove the turtledeck from the fuselage in order to finish the inside of it.
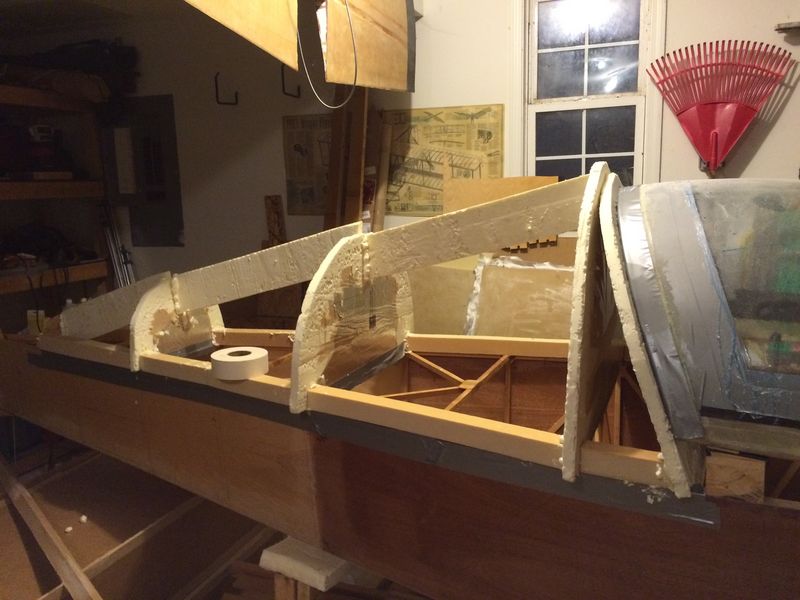

Above, I've sanded the frame using a length of cheap aluminum angle with sandpaper spray-glued to it. Now the frame will serve as a contour guide when inserting the rest of the foam.
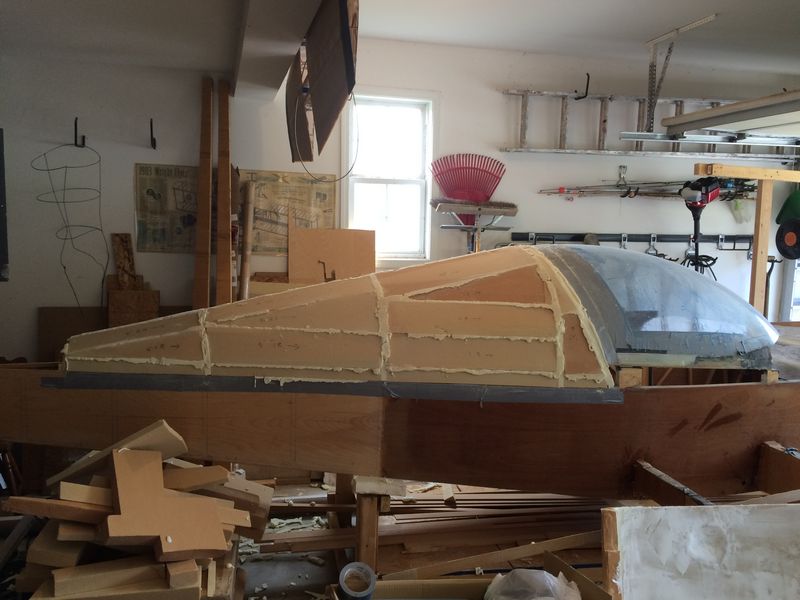
Above, I've got all the urethane pieces in place and bonded together with two-part "instafoam." I used 2" thick foam for the bottom two layers, mostly, but the rest of what you see is 1" thick foam. This method was straightforward and I think it cut down a lot on the amount of foam I could have wasted on this part of the build.

Above, I've completed the task of sanding all the foam down to contour. I've glassed it with one layer of "KR Cloth" and used peel ply to help keep it smooth. However, I can already see that I'll be doing a whole lot of micro-ing and sanding on this turtledeck!
I'm liking how the profile of my plane is taking shape...